
| Looking to replace those old worn rubber bushings? You can do this for better/crisper shifting and you don’t even have to go to the dealer to do it. Start by taking out the battery and battery tray (you CAN do this without removing the battery tray, but it is extremely awkward, tight and annoying. I highly recommend that you remove the battery tray); 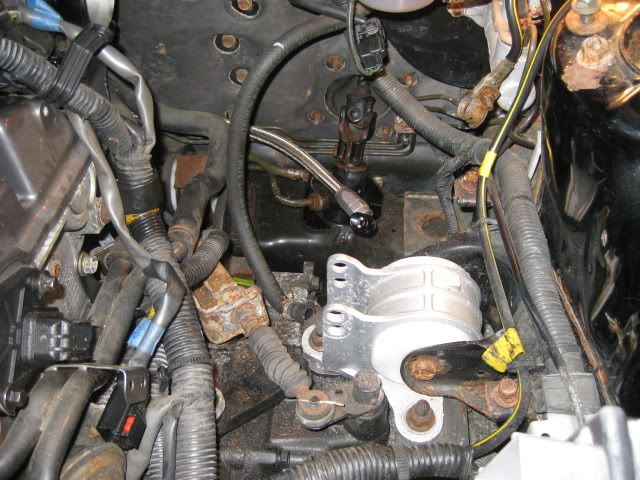 Now that you have access, you can see the shifter arms and the old rubber bushings on top of the transmission; 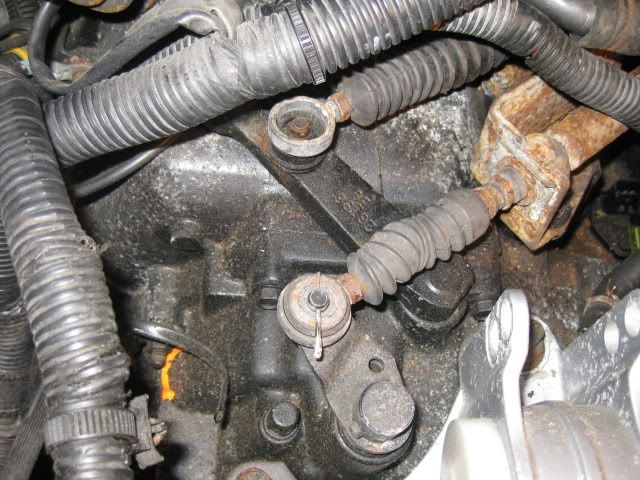 You can see in that pic, that one of the eyelets has already popped off. Simply pull out the old cotter pin; 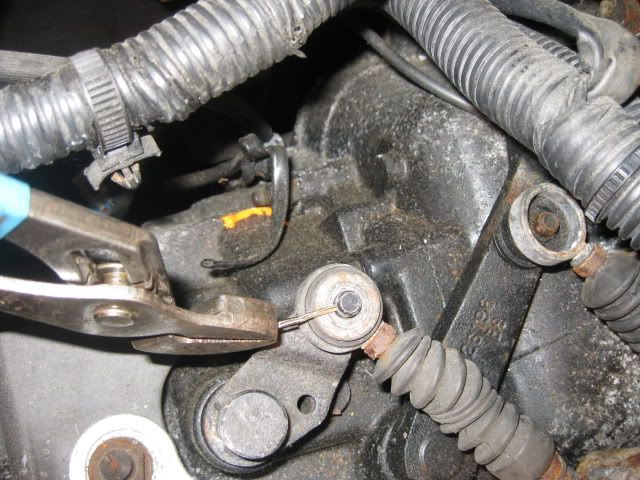 And then the bushing will pop right off the shift lever; 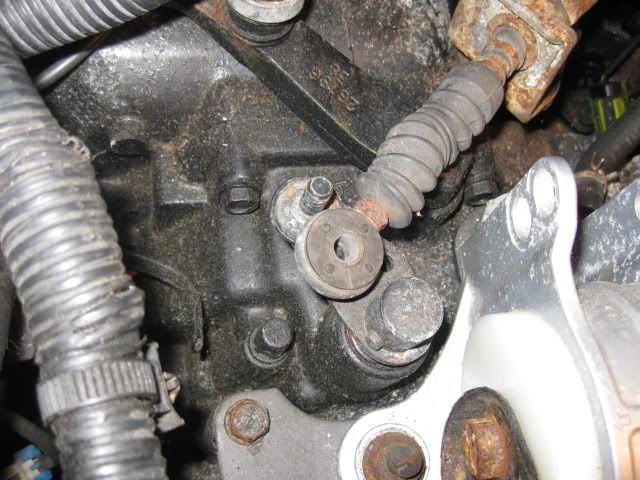 Sometimes, the metal ring inside the bushing will get rusted onto the arm. You may need a flathead screw driver to leverage it off, but it normally pops right off. Now simply pop the old bushing out of the eyelet. The easiest way to do this, is use a pair of channel locks and leverage it out. Just grab the center of the bushing and twist it up and she’ll come right out. Like this; 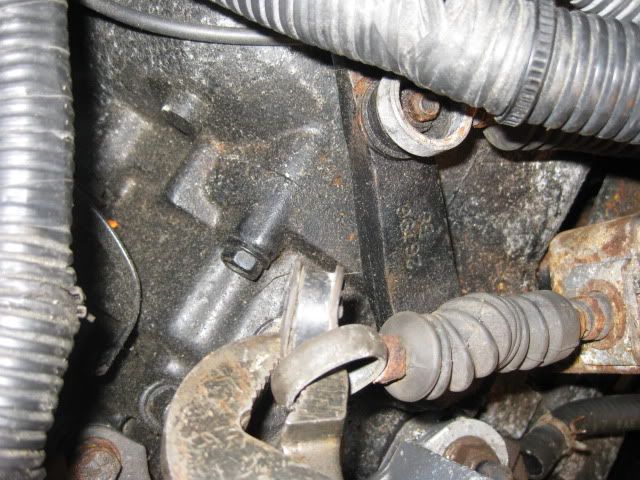 Now clean the inside of the eyelet up, so it will be easier to get the rollerskate bearing in. I use a die grinder with a sandpaper flapper; 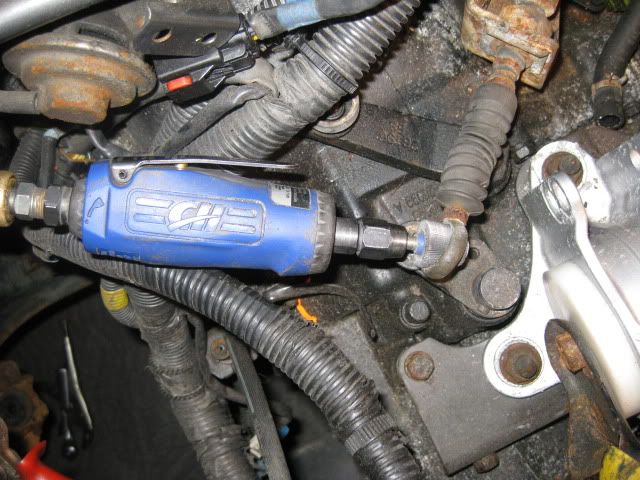 Once you have it cleaned up nice, you are ready to put these in; 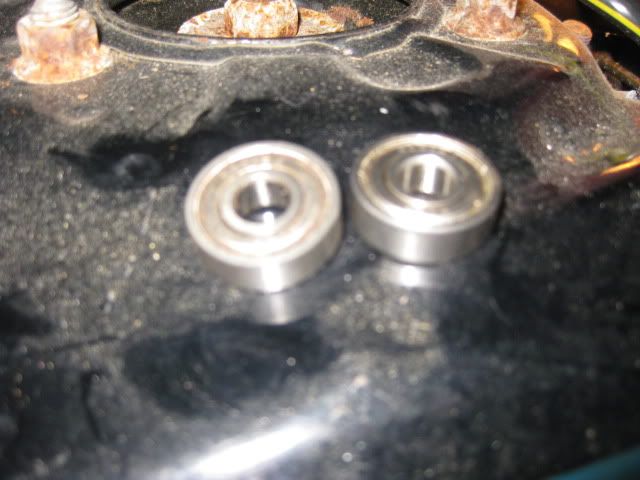 These are just standard rollerskate bearings from my rollerblades. These are old ones that I pulled out when I upgraded my bearings in the rollerblades. Nothing special about them, just standard rollerskate bearings. To help get them in, you will want to grease them up a little. I used white moly (just because I had it). It doesn’t matter what you use, just any kind of lube that will stay on the outside of the bearing;  Now you are ready to put them in. I line it up with the eyelet and then use some kind of pressing tool to get them in. Here I used quick clamps; 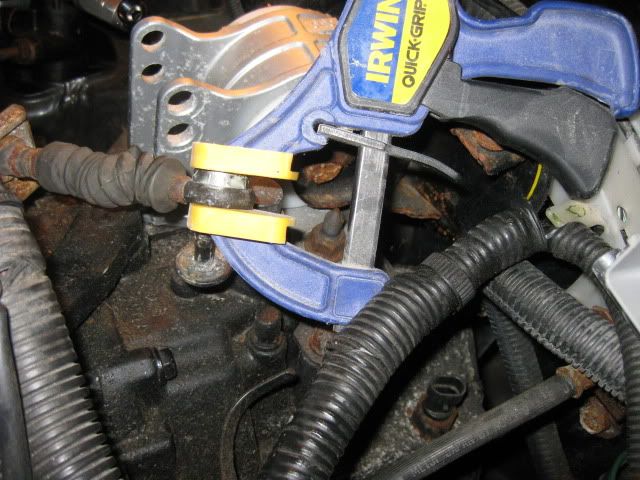 And I slowly worked it in. Sometimes they can be stubborn and you may have to work for a bit to get them in. When I get tough ones, I use vice grips (in basically the same manner as the clamps) with something between the teeth of the grips and the bearing so that you don’t damage the bearing. Once the bearings are pressed in, you need to slide them back on the shift arm. I like to hit the post on the shift arm with a little sandpaper first;  I lube up the post on the arm and the inside of the bearing, to make it easier to slide on; 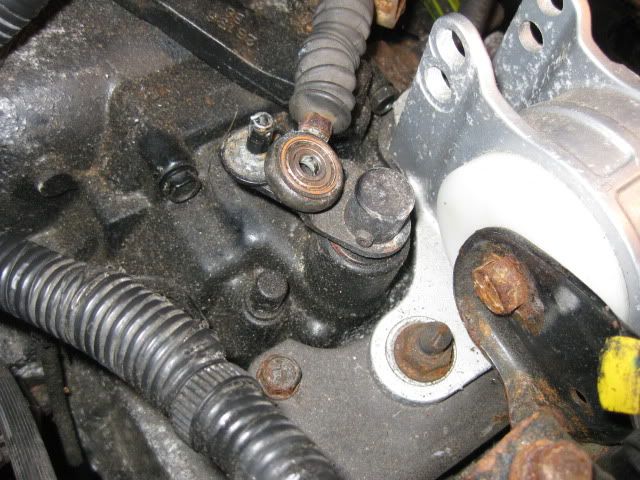 But before you slide the bearing on the post you will need to slip a washer over the post so that it goes under the bearing once you put it on (didn’t take any pics of this washer. The washer should be at least the same size as the eyelet, so that it has a little something to support it). Trying to slide the bearing on with the “horseshoe clip” in place is very awkward and annoying. You'll want to remove the clip so that the geometry is a lot easier and you don’t bend/break the cable;  Once you have it lined up, you need to push it over the post. I generally use a socket to tap it on;  I use a socket that goes over the post but pushes against the inside rim of the bearing (so you don’t hurt the bearing when you do this. In the pic, I am holding the socket up a little so that you can see the post in the middle. The socket actually fits over the post) Note here, I stated “tap it on”. You shouldn’t be smashing it on there, because the shift arm only has so much support. If you feel like it needs to be smashed on, then double check your post and inside of the bearing for foreign objects or burrs. Then simply slide another washer over the top (for your cotter pin to hit against. Not that the bearing is going to move any. But just in case it does), then put in a new cotter pin and reinstall your horseshoe clip (for some reason, I didn’t take a pic of this, but I think you can figure that one out) Now you’re ready to do the same on the next one, put the battery tray etc. back in and you’re good to go. written by bullettdsm transmission |
| Document statistics: Last modified on 2011-12-08 06:01:30 by bullettdsm |
