

A Bit of Background - I’ve always loved tinkering with things. My Eclipse was no exception. In 2006, I decided to build the 2.0L for a turbo. I was making good progress, but more reading on the forums introduced me to something different, swapping in a 2.4L from the cloud cars. Because of this, I ran the 2.0 with the forged internals N/A, and never got the turbo for it. As I began to research the 2.4 more in-depth, I came across the posts regarding the 2.6L that Brynden29 had built. Being young and immature, larger numbers meant bigger and better. I wasn’t concerned with how the builder got to 2.6 or why, I was just intrigued. So, once the block became available from a member on the forums, I popped for it. Once I received it, it was apparent that the block was junk as the cylinder walls were compromised. So I was left with the rotating assembly: a stroked crank, eagle rods, and custom JE pistons. In early 2009, I located a replacement 2.4 block from a 98 stratus. Got it home, tore it down, followed CODE4’s instructions for prepping it for ARP hardware, blocked off the oil passage to the balance shaft carrier, and off to the machine shop it went. I then bought an engine stand, and there the block was placed once the shop was finished with it. It was then painted. Little did I know, at the time, that this would be the last thing I did to it for about 5 or so years. - Fast forward to 2015, after I unsuccessfully tried to sell the setup, I began to think about the swap again. I bought some new rings and wrist pins for the pistons, and new rod and main bearings as well. I also began to research how this engine was first put together. I spoke to Polymer Dynamics on what they did to the rotating assembly. They informed me that the crank and rods were coated with an oil shedding material. It also seems that 6-bolt 4g63 rods were used for the build. It was around this time that I became aware of the term “rod ratioâ€, and learned that this build has an undesirable one. I also became familiar with words like “Shamuâ€, “bitch handsâ€, and the possibility that someone had rubbed their ass on the motor. Good thing I only bought the short block! Even with this knowledge, I decided to forge ahead. Getting back to the build, I checked the clearances of the rods and mains with plastiguage, with everything being within spec, and proceeded to install the rotating assembly. Locked the bedplate down with a la carte ARP hardware and set the rod bolts with a stretch gauge. Somewhere along the line, I read posts by DarkOne stating that the 2gnt power steering pump could be used with the SRT4 engine mount bracket, so I picked one up. Additionally, as I was hoping to keep my air conditioning, I grabbed the matching ac compressor mount. Expanding on a post from Alain95i4, I made some aluminum mounts to allow the 2gnt compressor to line up with the ps pump and crank pulley. 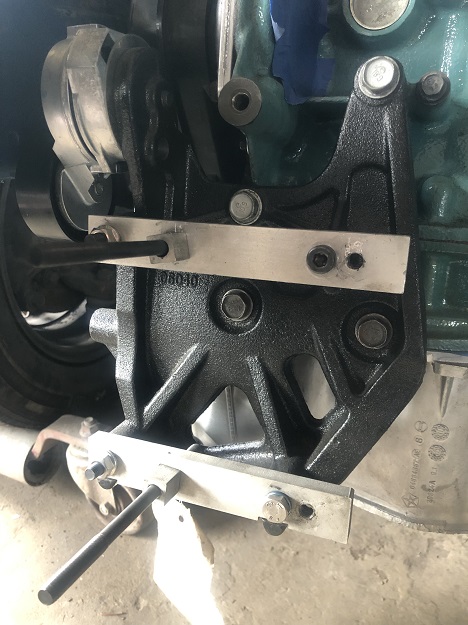 | | 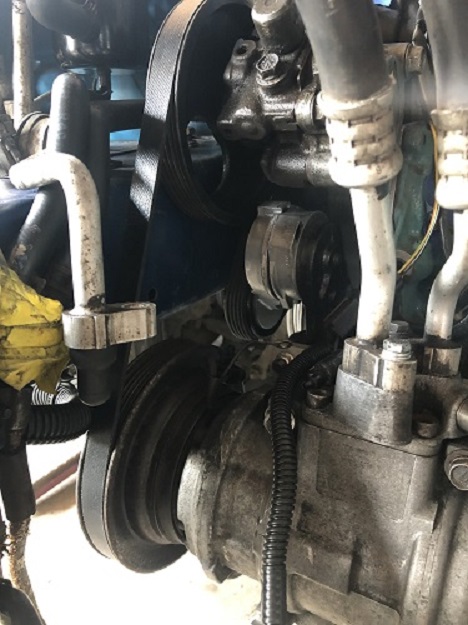 | | 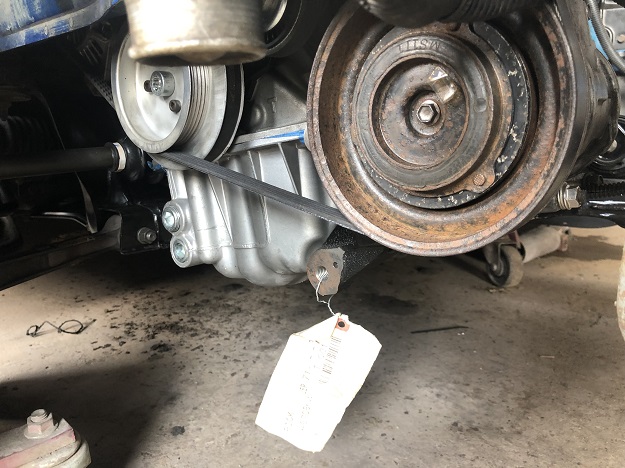 I was making progress, however again the block would stay in this state for another 5 years. Closer to the Present Day - For the last few years, the Eclipse had been suffering from a decent oil leak. Right before Covid hit, I had decided to garage the car, take the engine out and see if I could locate the source of the issue. Once I removed the heart of the beast (okay Beast is a strong term), and saw how filthy and worn it was, I was struck with an image of a clean 2.4 block just sitting in a storage unit wasting away. I grabbed it and hauled it down to the shop where the Eclipse was sitting with its chest cracked open. Once I had the block back on an engine stand, was the moment that I seriously began to believe the finish line could be reached. I found a new head, swapped in Crower springs and 2.4 lifters from my old head, upgraded to the 2.7 follower, and finished it off with some Crane 14’s to replace my damaged stockers. Alas, I had the ingredients to turn my short block into a long. - Actually, I’m getting way ahead of myself here. Prior to finishing off the top end of the engine, I had to address a few issues that accompany this swap. Passenger side motor mount Like I mentioned before, I decided to use the SRT4 engine mount bracket. I followed DarkOne’s lead and found a 1g driver’s side steel mount, cut the donut off the arm, and had it welded back on with a piece of 1 inch square tube perpendicular to the donut. I then used a piece of steel to link the square tube to the engine bracket, similar to the solution used by Micyek. 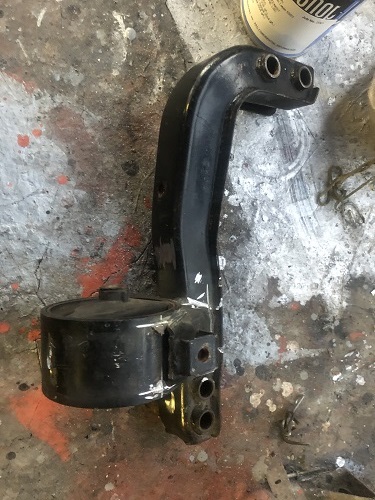 | | 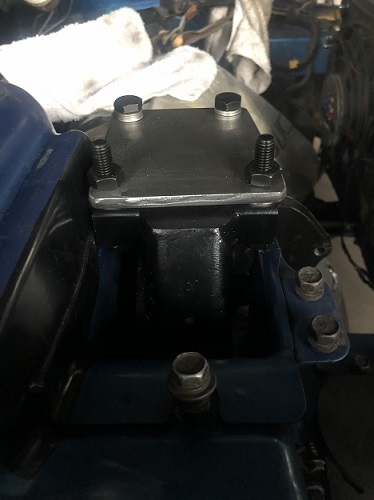 | | 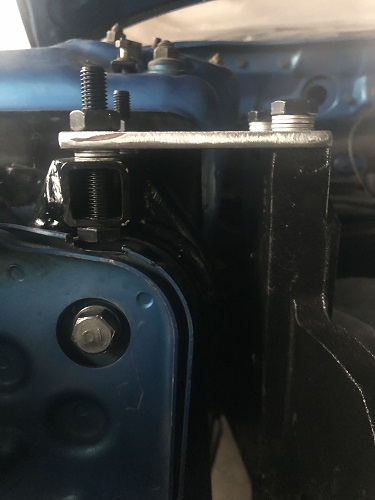 A problem this created was that the overflow bottle for the cooling system now wouldn’t rest on its mount in the stock location anymore. I decided to swap the position of the power steering reservoir and the overflow bottle. Using a few custom mounts for the reservoir and moving the overflow bottle mount to a clear spot near the ac drier, I was able to rectify the issue and now the engine mount, the overflow bottle, and the ps reservoir all play nice. 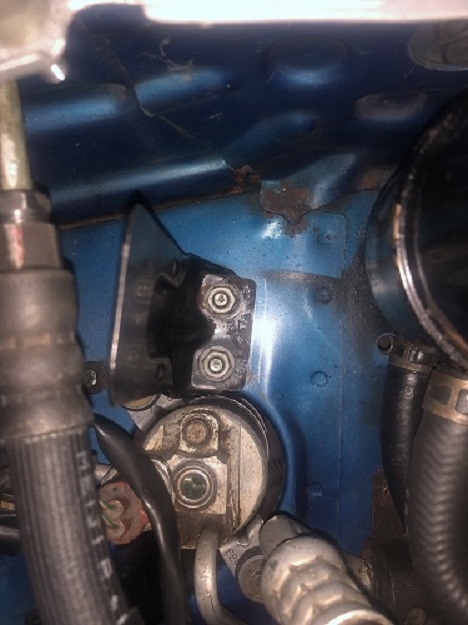 | | 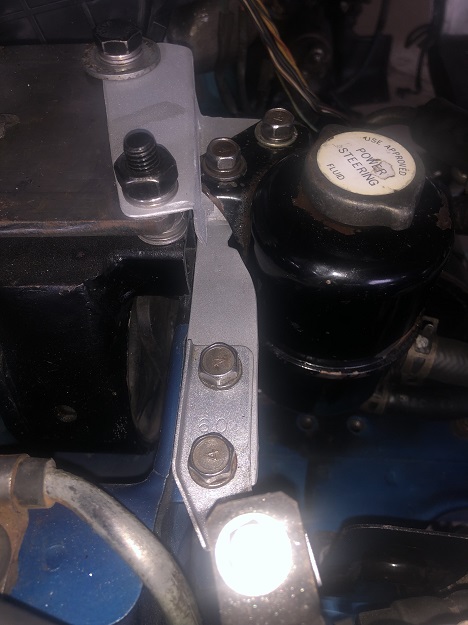 Equal length driveshaft - After seeing what Corbin did to develop a way to run equal length driveshafts on the 2.0L block, I wanted to attempt something similar on the 2.4L. I decided to use the setup from the v6 Avengers with automatic transmissions. There are 2 bosses on the back of the block (one of which the knock sensor would normally screw into), so I had a starting point. 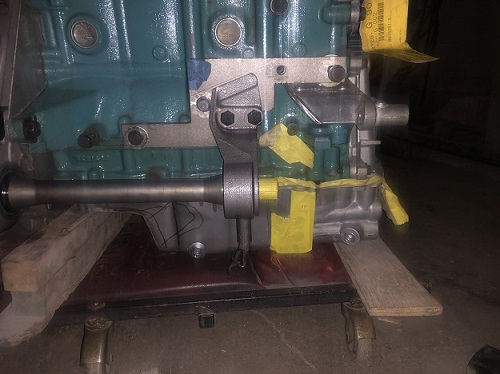 | | 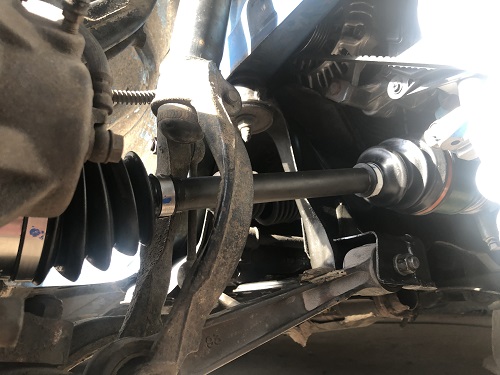 | | 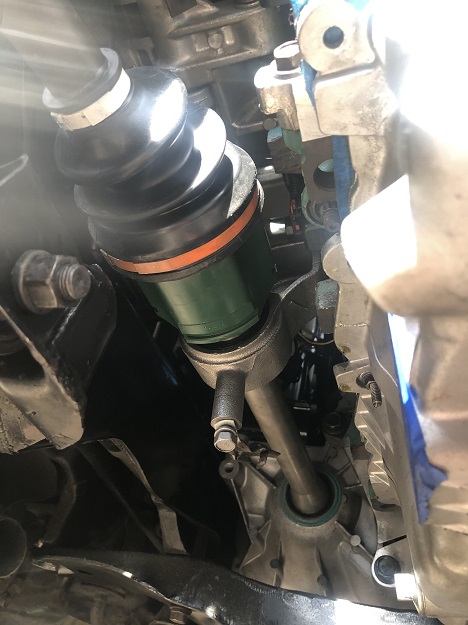 | |  | | I moved the knock sensor to the front side of the block to the hole I believe would normally mount the 420a lower water pipe. I then set out to see if I could also use the 2 bolts the lower alternator mount use, for added stability. Using a piece of flat steel, some stand-offs, and McMaster-Carr hardware, I was able to come up with something that I was comfortable with. Of course, the crank sensor had to be rotated away from the mount for clearance, however it just fits. Also, the clearance between the alternator and one of the mounting bolts is extremely close, but with the alternator locked down I figure it shouldn’t be an issue (although I hope I don’t have to change that belt too often). Exhaust - Using the SRT4 oiling setup requires addressing the exhaust. I wanted to keep the pan intact, but also wanted to run the downpipe as close to the stock path as I could. I removed as much of the aluminum used for the SRT4 pan-to-trans plate as possible, but found that I still didn’t have enough room for 3†tube. My solution, hack into the 2gnt lower centermember. There is a point where the centermember spreads wide and then comes back together towards the back, I cut this section away and had some 1/8†plate welded in. I think I left enough material to be structurally sound, but have no data to back up that claim. Even with all of this space created, 3†tube still wouldn’t fit comfortably. I was able to find a section of pipe that transitions from 3†round to oval and back again. With some persuasion with a hammer, I was able to shape this to fit around the oil pan and follow the lower edge of the centermember. This setup allowed me to keep the full pan, use the SRT4 pickup tube, and also use the oil filter adapter. 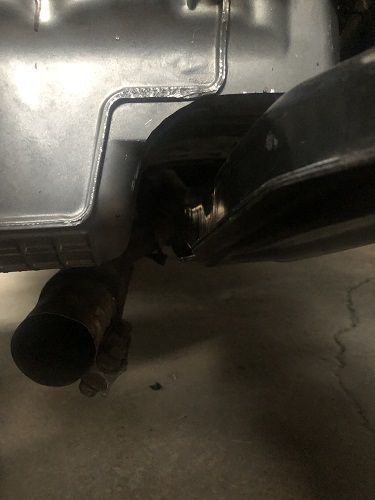 | | 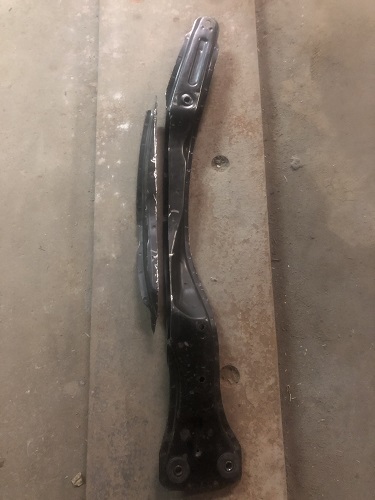 | |  | | 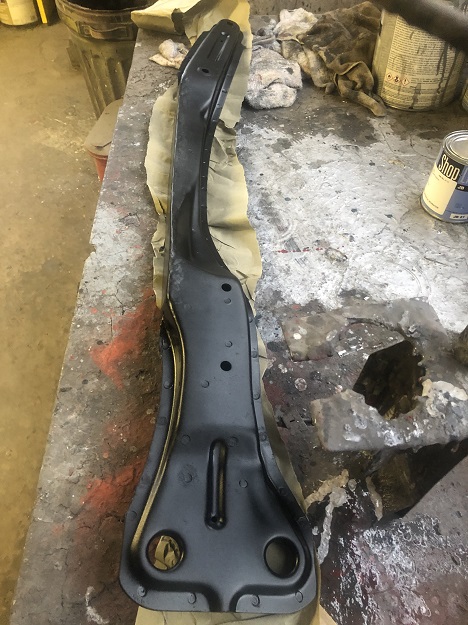 | | 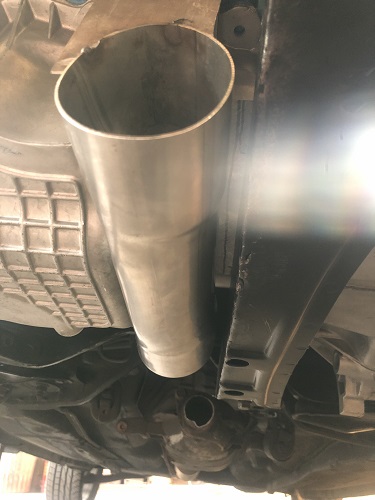 | | 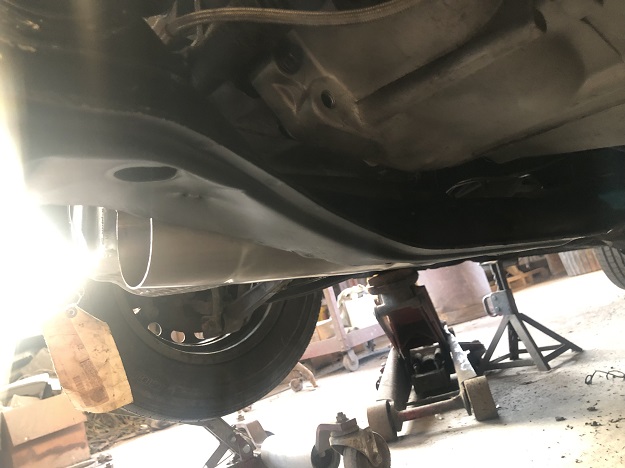 | |  Cooling - Another issue that I wanted to look into was making the PT Cruiser lower water pipe work with this setup. The way I figured would work was to use a 2g turbo Fluidyne radiator. The lower outlet is very near the inlet of the PT water pipe, so I figured I would be good. I assumed it wouldn’t be too difficult to find a hose that would link the two. The search was fruitless so I had to piece one together myself, which I’d like to change in the future. This became necessary because of how close the lower outlet sits to the ac compressor. I actually cut away some of the lower right mount on the compressor to provide additional clearance. Now I don’t have to concern myself with trying to run the lower hose or pipe across the block, and can keep the space open for the downpipe. The top inlet on the radiator is in the center of the top tank, which originally I didn’t think would be a problem. I was wrong. The inlet was too close to the turbine housing for comfort. Back to the welder, this time to move said inlet to the stock location for a 2gnt. Problem solved. 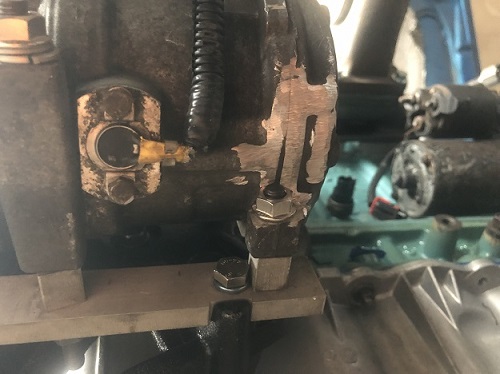 | | 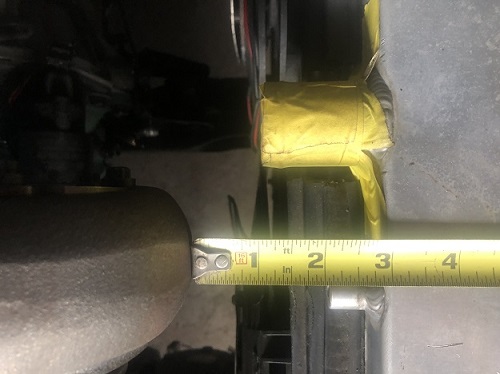 | | 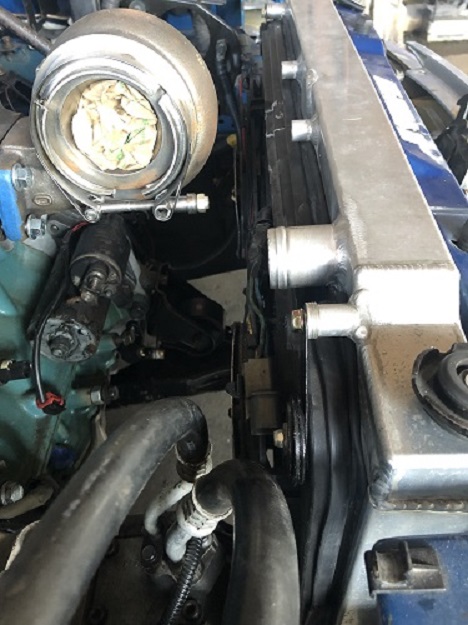 - According to my math, with the stock injectors being 235cc and the added displacement of the 2.6L compared to the 2.0L being 30%, I began looking for injectors @305cc, and found that late 80’s supercharged Thunderbirds used them. Another box checked. - Finally, the moment I had been waiting for, nearly 15 years in the making, I was ready to turn the key, except that I wasn’t. Even though I thought I had triple checked everything, I never swapped wires 1 and 3 for the coil. After that oversight was sorted...2.6L First Start |
| Document statistics: Last modified on 2021-11-09 08:16:43 by DirtMegirt |