

Cam Gear InstallationThis is how I did my cam gear install. As a word of caution I would like to say that I did not have the proper tools to do this. Please attempt this install only if you are slightly off your rocker. Any damage or harm caused as part of this writeup is unfortunately not my fault. Given the ability to do this with the proper tools and I would in a heartbeat. For a little background, this motor is sitting on the ground and removed from the car. The cam gears and timing belt can be installed while the motor is still in the car. I have done the timing belt both ways now. If you are attempting to do the timing belt while the motor is still in the car and you are having problems getting the passenger side motor mount bolts out, look at the A/C lines. You will see where one line sticks out a little bit further than the rest. You can unscrew the motor mount bolt all the way to the hard lines, jack the motor up slightly, and the bolt will come out between the lines far enough to get the mount out. This may not make sense now, but when you are looking at this it will. On to the mod! As you can see, the motor mount has been removed off the engine as well as the timing belt inspection plate. 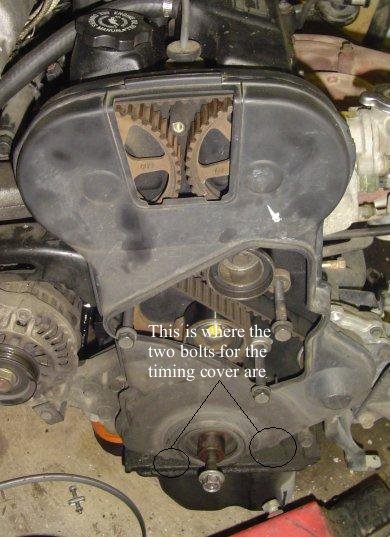 After you remove the cover, mark the timing belt for the direction it spins. Next loosen the bolts on the tensioner. This will allow you to remove the belt. 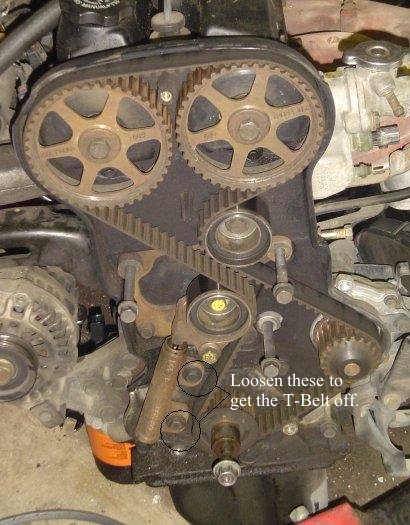 If you are going to reuse the hydraulic tensioner, you need to slowly crank down on it in a vise. I used a 1/16th inch drill bit as a pin in the tensioner. Now as you can see, I do not have a cam gear removal tool. So I grabbed the next best thing. A big set of channel locks. I haven't destroyed the cam gears yet and this is the second time that I have done this. Please attempt this at your own risk. Also note that the cams both have a 1/4 inch locating hole bored into them. if you don't want to potentially damage your cam gears, you can use a 1/4 inch extension in this hole to stabilize the cam for removal of the cam gear bolt. You'll have to remove the valve cover for this, however. 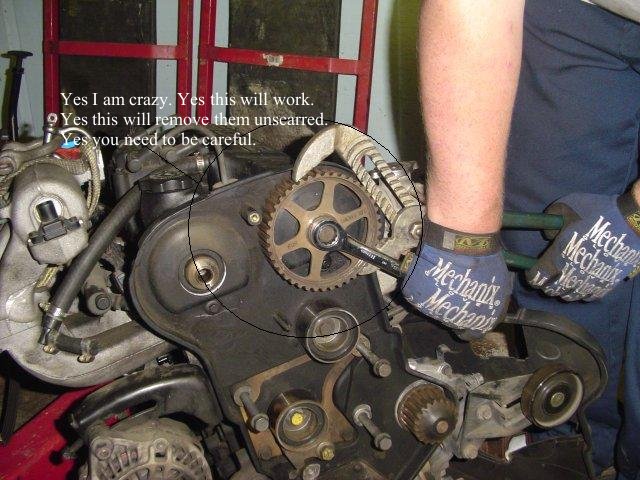 Installation is the reverse of the removal. I used a shop towel (or old undershirt) to ensure the cam gears were not harmed during installation. Tighten the cam gear bolts to 73 ft/lbs. For the love of your cam gears be freaking careful! 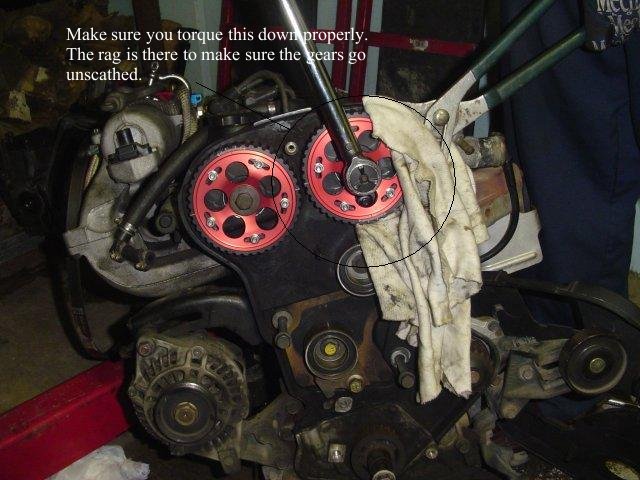 Next up is reinstalling the timing belt. Be careful here as the timing belt is kind of a PITA to get back on the crank gear. You do not want to damage it during installation. After you install the timing belt, set the crank to TDC by lining up the timing marks. Then reverse (counterclockwise) the timing 1/2 tooth. Install the timing belt around the water pump, under the idler pulley, around the exhaust cam, intake cam, and tensioner pulley.  I had a friend come over for another hand. You need to apply 21 ft/lbs of tension to the timing belt, while holding the tensioner firmly against the tensioner pulley, and tightening down the tensioner. If you have three hands, by all means let your friends be! The tensioner needs to be tightened down to 23 ft/lbs. 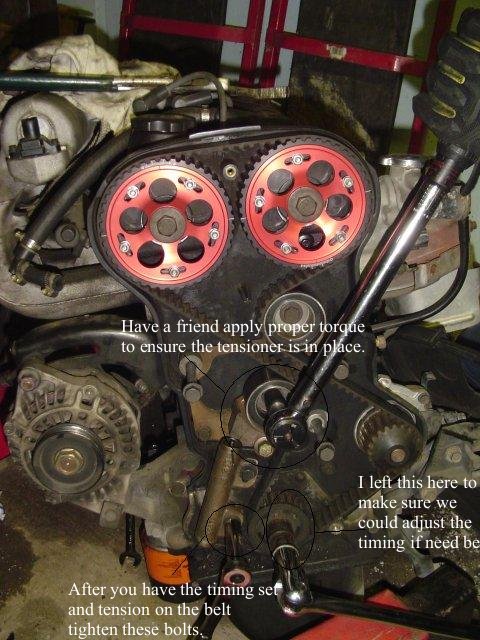 In the following picture you can see that my cam gears do not line up properly. I had this problem before since my head has been milled down some. 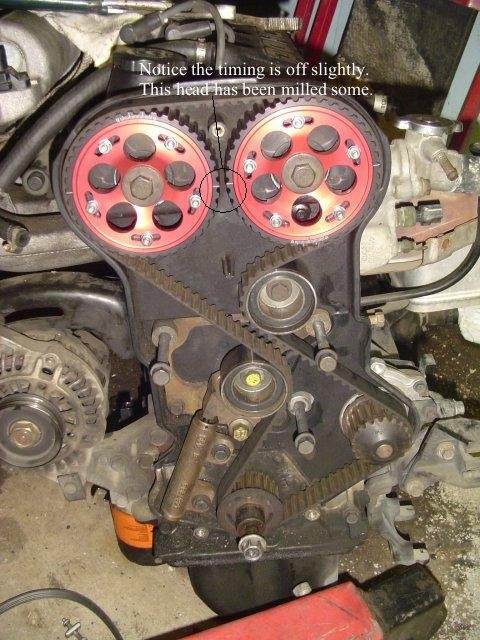 Now all that you need to do to finish up is reinstall your timing belt cover and motor mount. I decided to modify my timing belt cover at this point to make future adjustment easier. I believe this took about 15 minutes with a hack saw.  Again take this writeup with a grain of salt. Thanks to those who have posted before with enough hints to make this possible. Tuning |
| Document statistics: Last modified on 2007-04-04 14:36:40 by freelancefool |