

How to Perform a DIY AlignmentThe motivation and idea to conduct such a task is credited to members over at NASIOC.First, please familiarize yourself with the information over at NASIOC and the fundamentals of what is required in an alignment. This article assumes you know what camber, caster, and toe are and how each affects drivability, performance, and tire wear. NASIOC articles Make your own camber gauge Maximum traction and maximum tire wear do not go hand in hand. With that aside, understand there are many ways to align your car. Below is the way I have done it - it is tedious to set up however will yield excellent results if you take your time and remain consistent in your measurements. ***You must have a flat work surface to measure and adjust camber. Do not assume your garage floor is flat without checking. Use 1/8" floor tiles to build up the corners. Alternatively, using the Craftsman digital level, zero the level on the ground immediately in front of or behind the tire so that the level takes into account the tire's surface.*** To measure camber you can purchase any number of devices on the market depending on your budget. Read the link above to create your own low-dollar camber gauge that is capable of 0.1* resolution. Simply apply the DIY camber gauge against the rim lip at the 12 and 6 o'clock position.Adjusting camber is dependent on your setup: either upper control arm mounts or an adjustable ball joint. Remember: if you do not have grease plates of some sort, you need to roll the car forward and back to allow the suspension to settle. You cannot accurately measure a camber change after lowering the vehicle on pavement without allowing it to settle.***Toe must be measured and adjusted after camber is altered*** Materials required for toe measuring & adjustment: 1. (4) Jack stands. 2. Thin line (preferably less than 1/16" thick) that has a high contrast and easy to read against a measuring device. I used pink bricklayers line available at Ace or Home Depot. It is a little thick though, so you must take readings from one side or another. 3. (2) 2x4s of exact length. Mine are 72" - I went to Home Depot and bought a 12' 2x4 and had it cut exactly in half. These serve to ensure your jack stands are equally spaced from front to rear.4. Accurate ruler, 1/16" resolution. 5. Digital caliper with depth capability. Setup:***Ensure your steering wheel is centered prior to setup*** 1. Begin by staging your 2x4s in front of and behind the axles as shown in the photos. Eye them up so they are as close to centered as possible. Place a jack stand flush against the 2x4 end at each corner. It is not crucial that the spacing from a front stand to rear stand is identical to the otherside. 2. Run the brick layer line taught from front to rear on both sides. 3. Measure the distance between the floor and your center cap. Adjust your jack stand height so that the line is as close as possible to that height. This ensures that readings taken perpendicular from the rim surface to the line is parallel to the floor. 4. Understand your vehicles Track Width. 2Gs do not have identical Track Widths between the front and rear axle. Therefore you cannot make the distance between all four center caps and the string identical - the string would not form a square. Starting with one axle, measure the distance between one center cap and the string. If your string is thicker than 1/16", pick the inside or outside of the string to measure from and stick with it for the rest of the procedure. 5. Remaining on that axle, move to the other side and measure the distance to the string. If your initial 2x4 placement was close, your measurement will be close. It will likely be off, so take the difference between the two measurements and divide by two. That is the distance you must gently slide the jack stand toward the opposite side (and in turn moving the 2x4 and far jack stand). For example, if your first measurement was 5 inches between cap and string, and second measurement between cap and string was 6 inches, you have a 1 inch difference. Divided by 2, you move the assembly over 0.5 inches, ideally creating a 5.5 inch gap between both center caps and strings.6. Making slight adjustments, alternate between pssenger and driver side until your measurements are close. Do not worry about being exact just yet as when you alter the other axle, you will change the measurements slightly. 7. Repeat steps 4 & 5 on the opposite axle. Note that the distance between the center caps and strings will be slightly greater for the rear axle than the front axle. 2G track widths are narrower in the rear. 8. When the distance between the center caps and strings are equal on the rear axle, and the same applies to the front axle, your string & jack stand setup is square to the chassis of your car. This may require slight adjustments, moving from front to rear as moderate adjustments will affect the spacing on the opposite axle. 9. Place sand bags, bricks, or any other weights either on or around the jack stands as you do not want them to move! Taking readings:1. Using the best resolution tool you have, measure the distance between the wheel at 9 o'clock & 3 o'clock to the string. Again, be consistent on which point of the string you are taking measurements from. Keeping some scratch paper handy, record your numbers for all four wheels. 2. Sloppy or impatient work here will yield sloppy results. Using grease or slip plates will make adjustment & follow-up readings easier. Without disturbing the strings, adjust your outer tie rods accordingly. If your readings indicate a toe-in condition (distance from the front of your wheel is greater than the distance from the rear of your wheel) you need to pull your outer tie rod in. The reverse applies if you are toed-out. 3. Rear toe is adjusted differently, by rotating the cam bolts on the rear control arms. 4. Decreased ground clearance will make adjustments much more difficult. Be creative if necessary and place your vehicle on cinder blocks or blocks of wood of sufficient size to elevate your car prior to measurement. Obviously your string and jack stand assembly must be elevated to remain on the same plane as your center caps. ***Use common sense and safety when creating your own platforms for the 4 wheels. I assume no responsibility if you crush yourself in the event you used inferior or inadequate load bearing materials.*** 5. If grease plates are not available, make all adjustments to your best estimation, and roll the car forward & back into position. This will require you to tweak the string setup if necessary. 6. Measure again, and repeat the process. 7. Remember: Toe must be adjusted after all other suspension geometry changes! 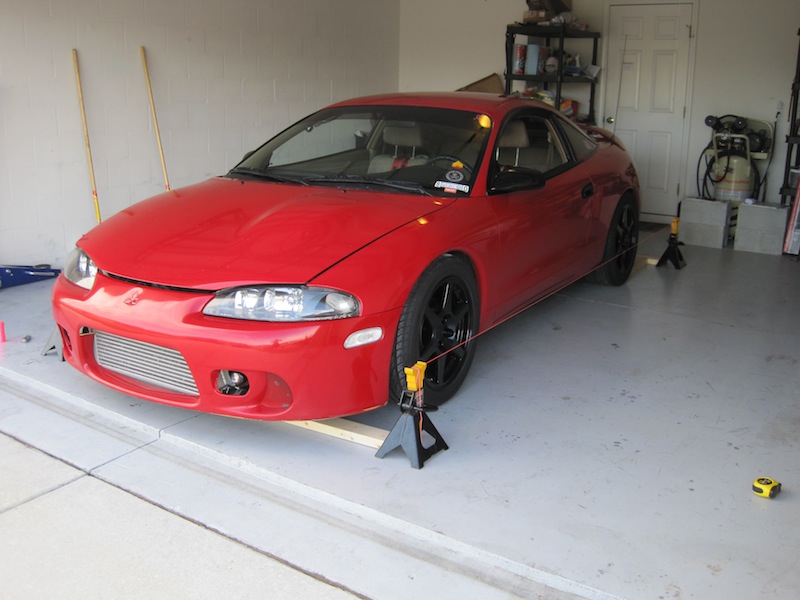 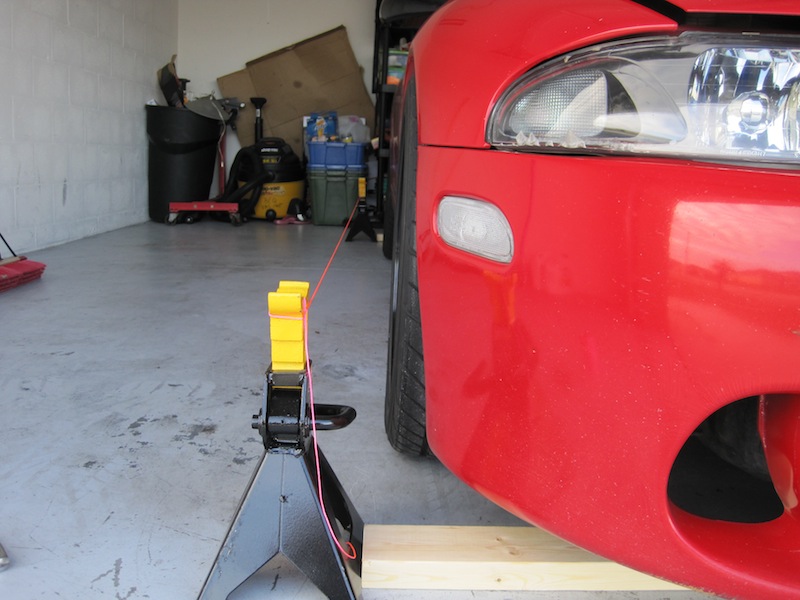 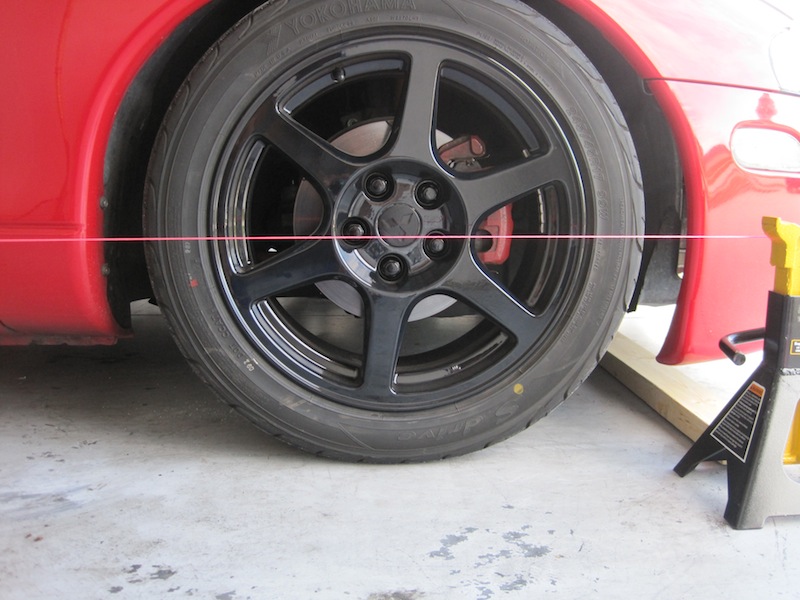 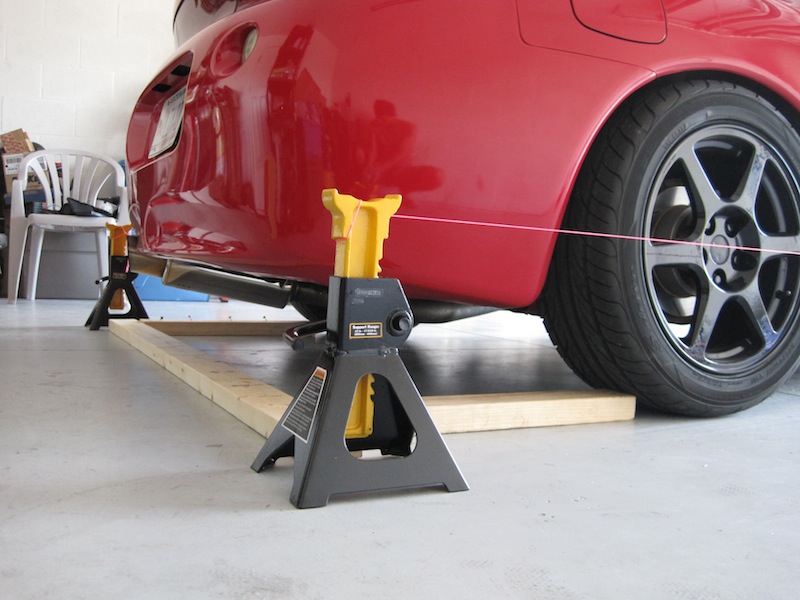 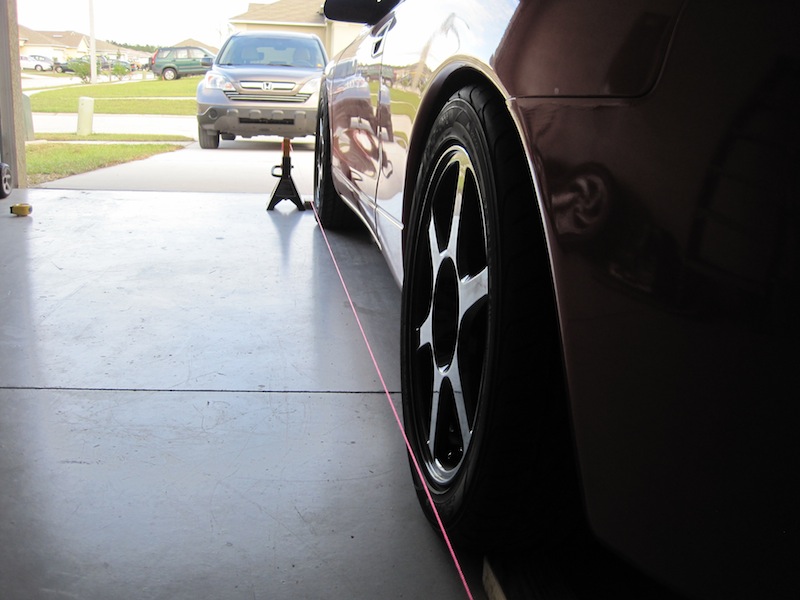 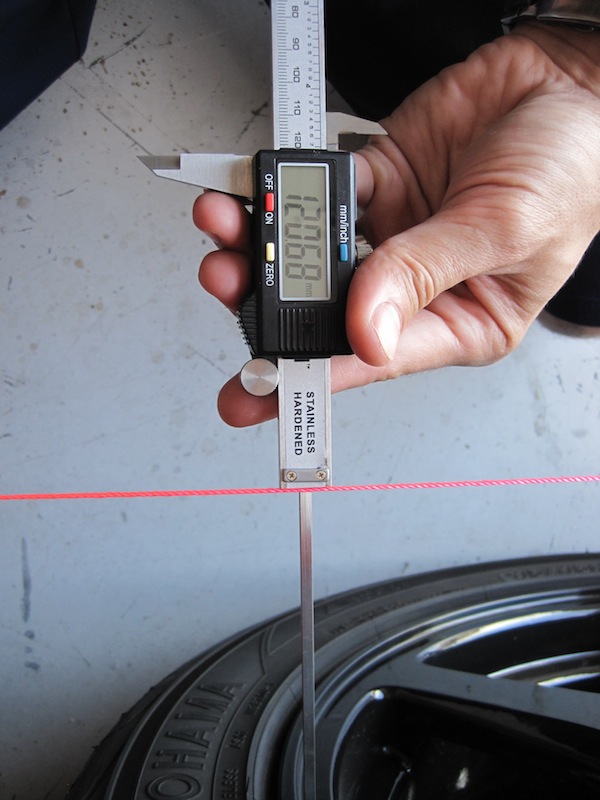 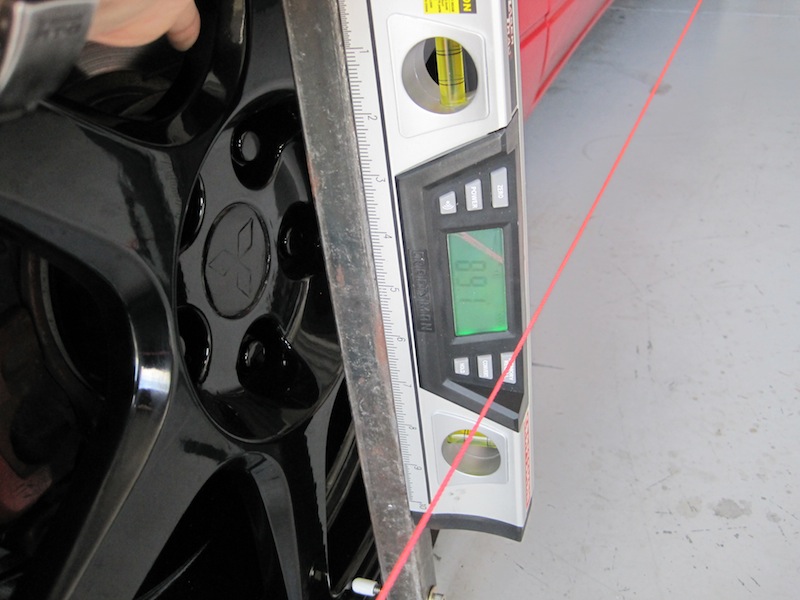 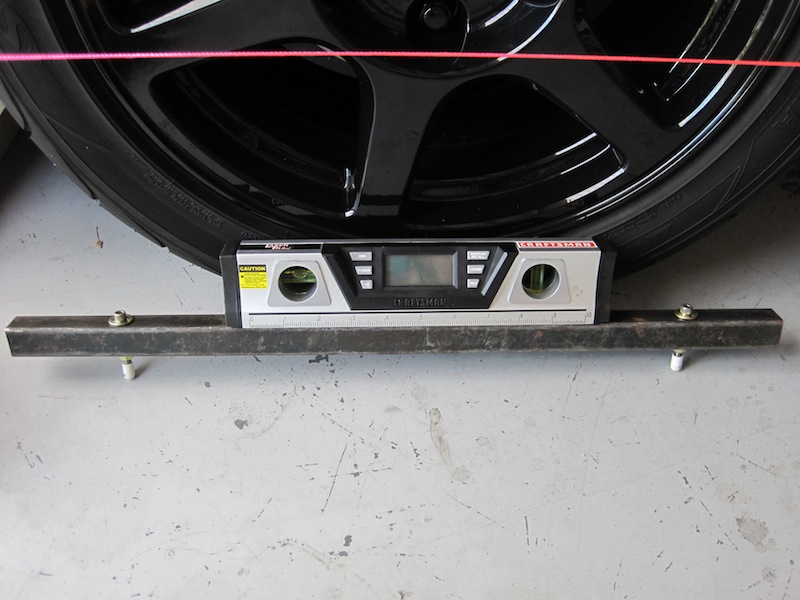 wiki by CODE4Handling_Maintenance |
| Document statistics: Last modified on 2010-11-28 20:28:47 by CODE4 |